Pageview goals
Pageview goals allow you to measure how many people visit a specific section of your site (for instance dynamically created checkout pages for ecommerce) and get referral sources and other details for those conversions.
Since pageviews are collected automatically, you don’t need to change your website’s code to measure pageview goals. This makes pageview goals the easiest way to start tracking any type of conversion on your site.
Do you run a store and want to track purchases? Do you have a contact form and want to track form submissions? Use pageview goals to track the "thank you" page or the order confirmation page.
Track pageview goals in a simple privacy-first dashboard
To get started with Pageview Goals, go to your website's settings in Plausible Analytics and visit the Goals section. You should see an empty list with a prompt to add a goal.
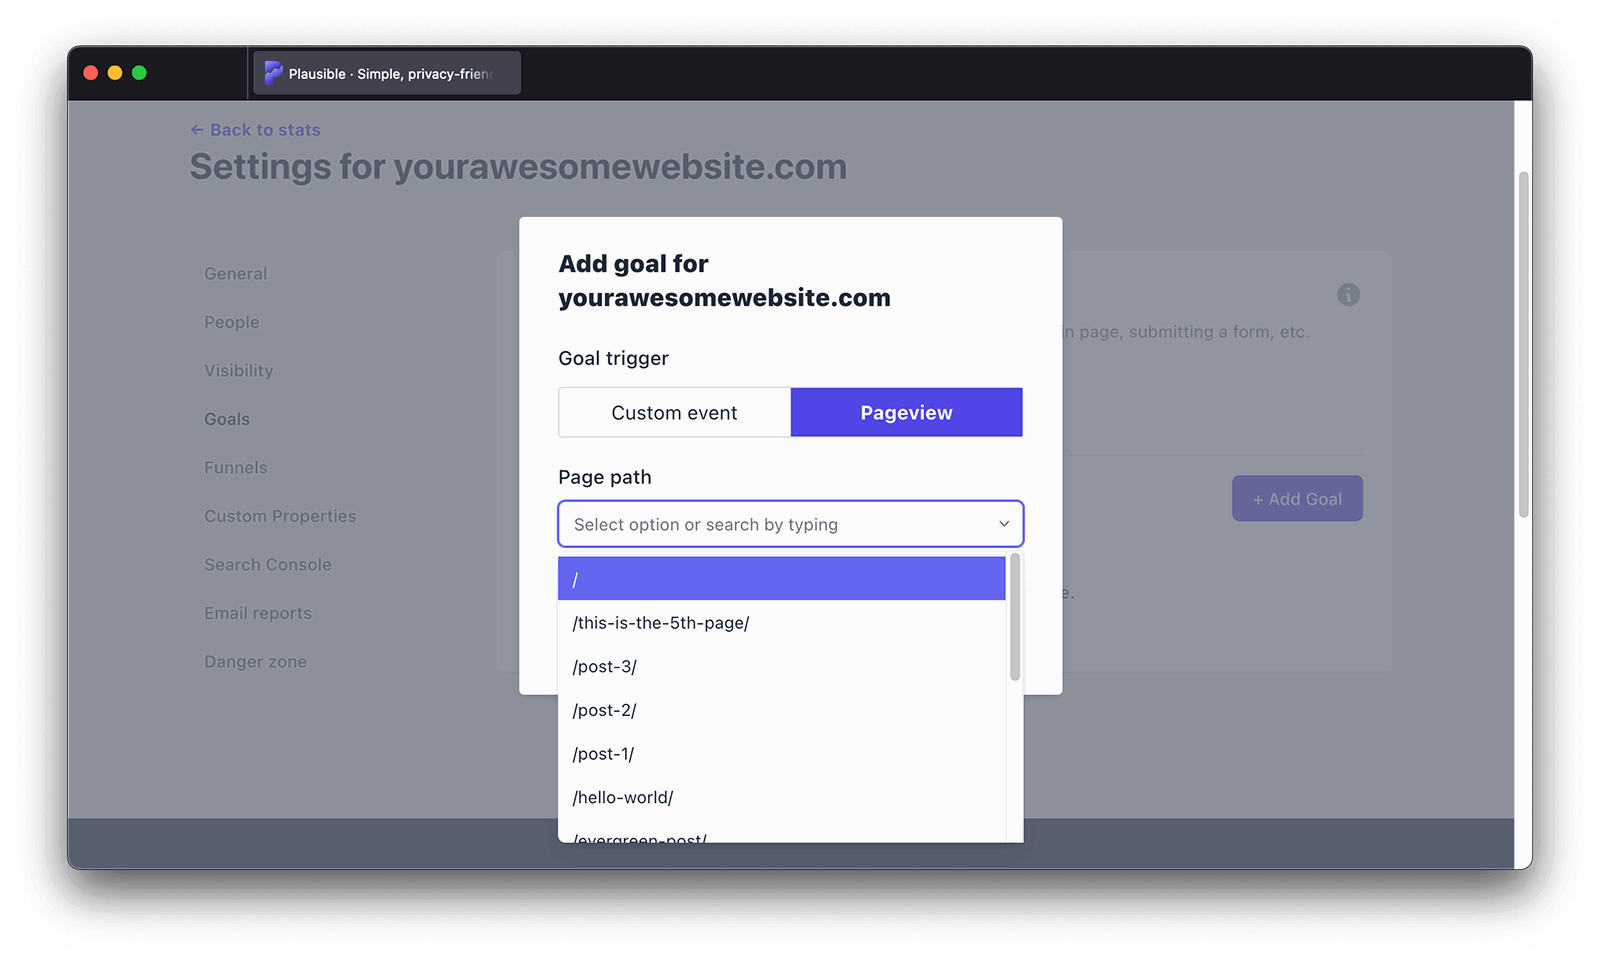
Click the + Add goal button to go to the goal creation form.
Select Pageview as the goal trigger and enter the pathname of the page you would like your visitors to hit, or select the same from the dropdown. The pathname must match the page path you can see in your Plausible Analytics dashboard.
Next, you'll see the Display Name field, pre-filled based on the pathname. You can optionally edit it now or at any time later.
Narrow goals with custom properties
When creating a pageview goal, you can optionally narrow it down using custom properties. This lets you turn a broad goal into a more specific one by matching only events with certain property values. For example, you can create a pageview goal for /dashboard that only counts visits where account_type = trial, letting you measure dashboard engagement specifically from trial users.
Then click the Add goal button and you’ll be taken back to the goals page. When you navigate back to your Plausible Analytics dashboard, you should see the number of visitors who reached the specified page or group of pages. Goals are listed at the bottom of your dashboard.
How to group your pages
Do you want to analyze the total traffic to specific sections of your site or to group your dynamically created pages? You can use an asterisk (*) to match patterns in your page path URLs. Asterisks can be placed on either end or in the middle of any page path URL.
You can for instance group all of your blog posts by creating a pageview goal /blog* (if your blog subdirectory is named blog) or track Woocommerce checkout pages for your ecommerce by creating a pageview goal /checkout/order-received/*.
You can do so by using the "Filter" button on the top of your dashboard
What's next?
Now that you're tracking pageview goals, you can:
- Build a conversion funnel to measure drop-off across a defined sequence of steps
- Add custom events for more specific tracking like button clicks
- Use filters and segments to analyse which sources and campaigns drive the most conversions
- Explore user journeys to see the paths visitors take before and after converting
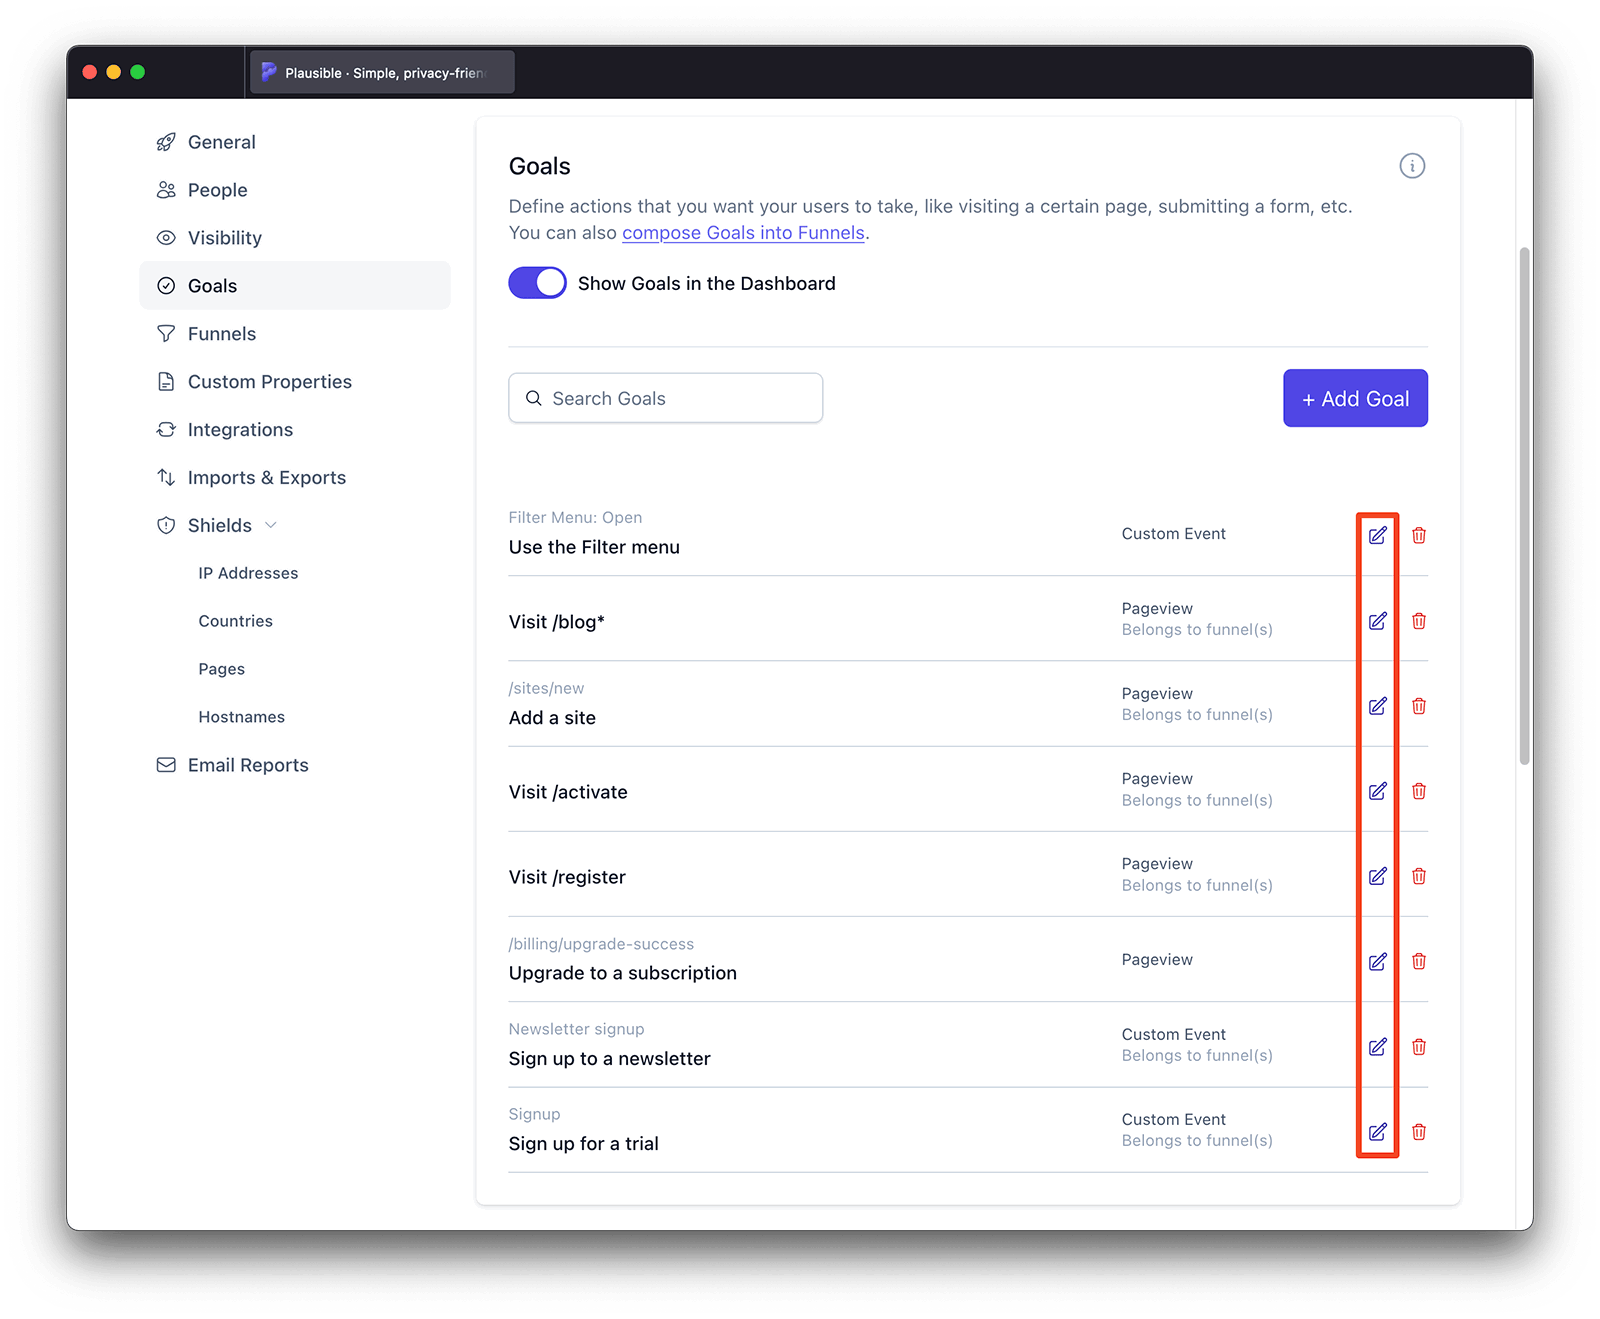
Edit a Pageview Goal
To edit a Pageview Goal, start by locating the pageview goal you want to update in the Goals list in your website's settings. Click on the button with the pencil icon next to it, which will bring up the goal editing form.
The goal editing form is exactly the same as the one you see when adding a new goal. From the pop up, you can select a new page path from the dropdown menu that matches the updated page you want to track.
You can also give it a new display name to keep your reports and funnels easy to read. Or add a custom property to narrow down your goal to specific visitors.
Once you’ve made the necessary changes, click "Update goal" and your updated settings will be applied immediately.